Cadbury's Creme Egg Cheesecake Recipe

HOW TO MAKE A NO BAKE CADBURY'S CREME EGG CHEESECAKE, THE PERFECT RECIPE FOR EASTER

Cadbury's Creme Egg Cheesecake Recipe

When I sent the husband to the shop for mini Cadbury's creme eggs last week he found the shelves empty. It's that time of year where from the very moment the Easter goodies hit the shelves (which is straight after Christmas these days!), every organised baker starts to hoard mini creme eggs ready to bake in to brownies, cheesecakes, cakes and cupcakes. Unfortunately I am not that organised baker. 

Nothing screams Easter more than baking an indulgent creme egg in to a recipe, with it's splash of white and yellow fondant yolk, adding extra chocolate, sugar, butter, biscuits and cream can only but seal the deal.

So my husband didn't return with mini creme eggs but he didn't return empty handed, he bought almost every other option available including several bags of Cadbury's Minis selection that contain lots of types of Cadbury's mini eggs including oreo, daim, dairy milk and creme eggs. Not a problem I thought! I can work with that!

Feeling like I was in an episode of Can't Cook, Won't Cook off of the 90's, I took the ingredients I had in front of me and set to work on creating an Easter Creme Egg Cheesecake Recipe. I wanted the cheesecake to mimic the sweetness of the fondant centre of the creme egg itself and by adding the secret ingredient of condensed milk, I achieved the taste I was aiming for.

Be warned this recipe is sweet. Very sweet. You definitely only need a small slice to satisfy the sweet tooth of sweet tooth's, but as my Mum use to tell me, good things come in small packages or in this case small slices! I for one will most definitely be making this one again.

Cheesecake ingredients

NO BAKE CREME EGG CHEESECAKE RECIPE

INGREDIENTS

  • 560ml Double Cream
  • 360g Full Fat Philadelphia Cream Cheese 
  • 200g Nestle Condensed Milk
  • 150g Digestive Biscuits
  • 130g Golden Oreo Biscuits 
  • 130g Butter
  • 100g Caster Sugar

CHOCOLATE FILLING

  • 250g of chopped Mini Cadbury's Creme Eggs or an alternative. Due to the mini creme egg shortage I have used a mix of of mini Cadbury's oreo, dairy milk, daim and creme eggs and mini Galaxy caramel eggs in this recipe instead.

DECORATION

  • 3 Full Size Cadbury's creme eggs, halved
  • 2 Mini Galaxy Caramel eggs, halved
  • 50g Milk Chocolate, for decoration
  • 100g White Chocolate , for decoration
  • Sugar flair Egg Yellow food colouring

METHOD

1) Line an 8 inch round loose bottom tin with baking paper. 

2) Crush the digestive and Golden Oreo biscuits. Whether you bash with a rolling pin, use a food processor or a chopper, blitz those biscuits!

3) Melt the butter in a saucepan on the hob, remove from the heat and add your biscuit crumbs and stir until combined. This is your buttery biscuit base, pour evenly in to the lined tin, press the crumb mixture using the back of a spoon and place in the fridge to chill.

Chocolate Cheesecake Easter Recipe

4) Chop the mini creme eggs or your preferred alternative chocolate filling into bite sized chunks.

5) Using a hand mixer, cream together the cream cheese, caster sugar and condensed milk.

6) In a separate bowl use the hand mixer to whip the double cream until it just starts to thicken.

7) Add the whipped double cream to the cream cheese and mix through on a low setting until combined. Add your chopped mini creme egg chocolate chunks and fold through the mixture until the pieces look like they are fairly evenly distributed.

8) Carefully spoon your mixture on to your biscuit base, smooth with the back of a spoon and pop back in to the fridge to chill. The cheesecake is best left to set in the fridge over night but if you cannot wait that long to face plant into it, try to leave it to set for at least 4 - 5 hours. 

OPTIONAL DECORATION: If you want to give your Creme Egg Cheesecake that extra wow factor what better way is there to do it than to dress it up with strategically placed creme eggs and lashings of chocolate. 

9) Once the cheesecake has chilled and is ready to be served, remove it from the tin and carefully pull away the baking paper. Carefully cut 3 large creme eggs and 2 Galaxy Caramel eggs in half. Melt the milk chocolate and the white chocolate in separate bowls. I melt my chocolate in the microwave by breaking the chocolate in to small pieces and placing  in a bowl. Heat for 30 second bursts on a low setting, stirring really well in-between and repeat until smooth. To achieve a nice bright yellowy orange chocolate to match the colour of the creme egg yolk add Sugar Flair Egg Yellow food colouring to half of the white chocolate and stir.

Chocolate piping bags

10) Fill three disposable piping bags with the milk, white and coloured chocolate, snip off the ends one at a time and drizzle the chocolate over the cheesecake. I've gone for a bit of a haphazard tartan grid like effect, piping chocolate lines of each colour horizontally and vertically across the cheesecake. The chocolate sets rather quick on the chilled cheesecake so it's worth getting those creme egg decorations in place straight after. 

11) Yay! You made it! What a clever sausage you are... now don't deny yourself, tuck in, you've earned it!

After adding the decoration I popped the cheesecake back in the fridge until it was ready to be served. Remember any recipe that includes fresh cream or cream cheese should not be left out of the fridge for any longer than 2 hours. 

When I served the cheesecake later that evening the drizzled chocolate had formed a nice chocolatey cage that snapped beautifully when the serving knife cut through it.

Easter Chocolate Creme Egg Cheesecake Recipe

Happy making! I'd love to hear how you got on and to see your results.... Tag me on Instagram @thecustomcakeshop, Twitter @customcakeshop

Rachel x

How to make Ice Cream Cone Cupcakes

How to make Ice Cream Cone Cupcakes

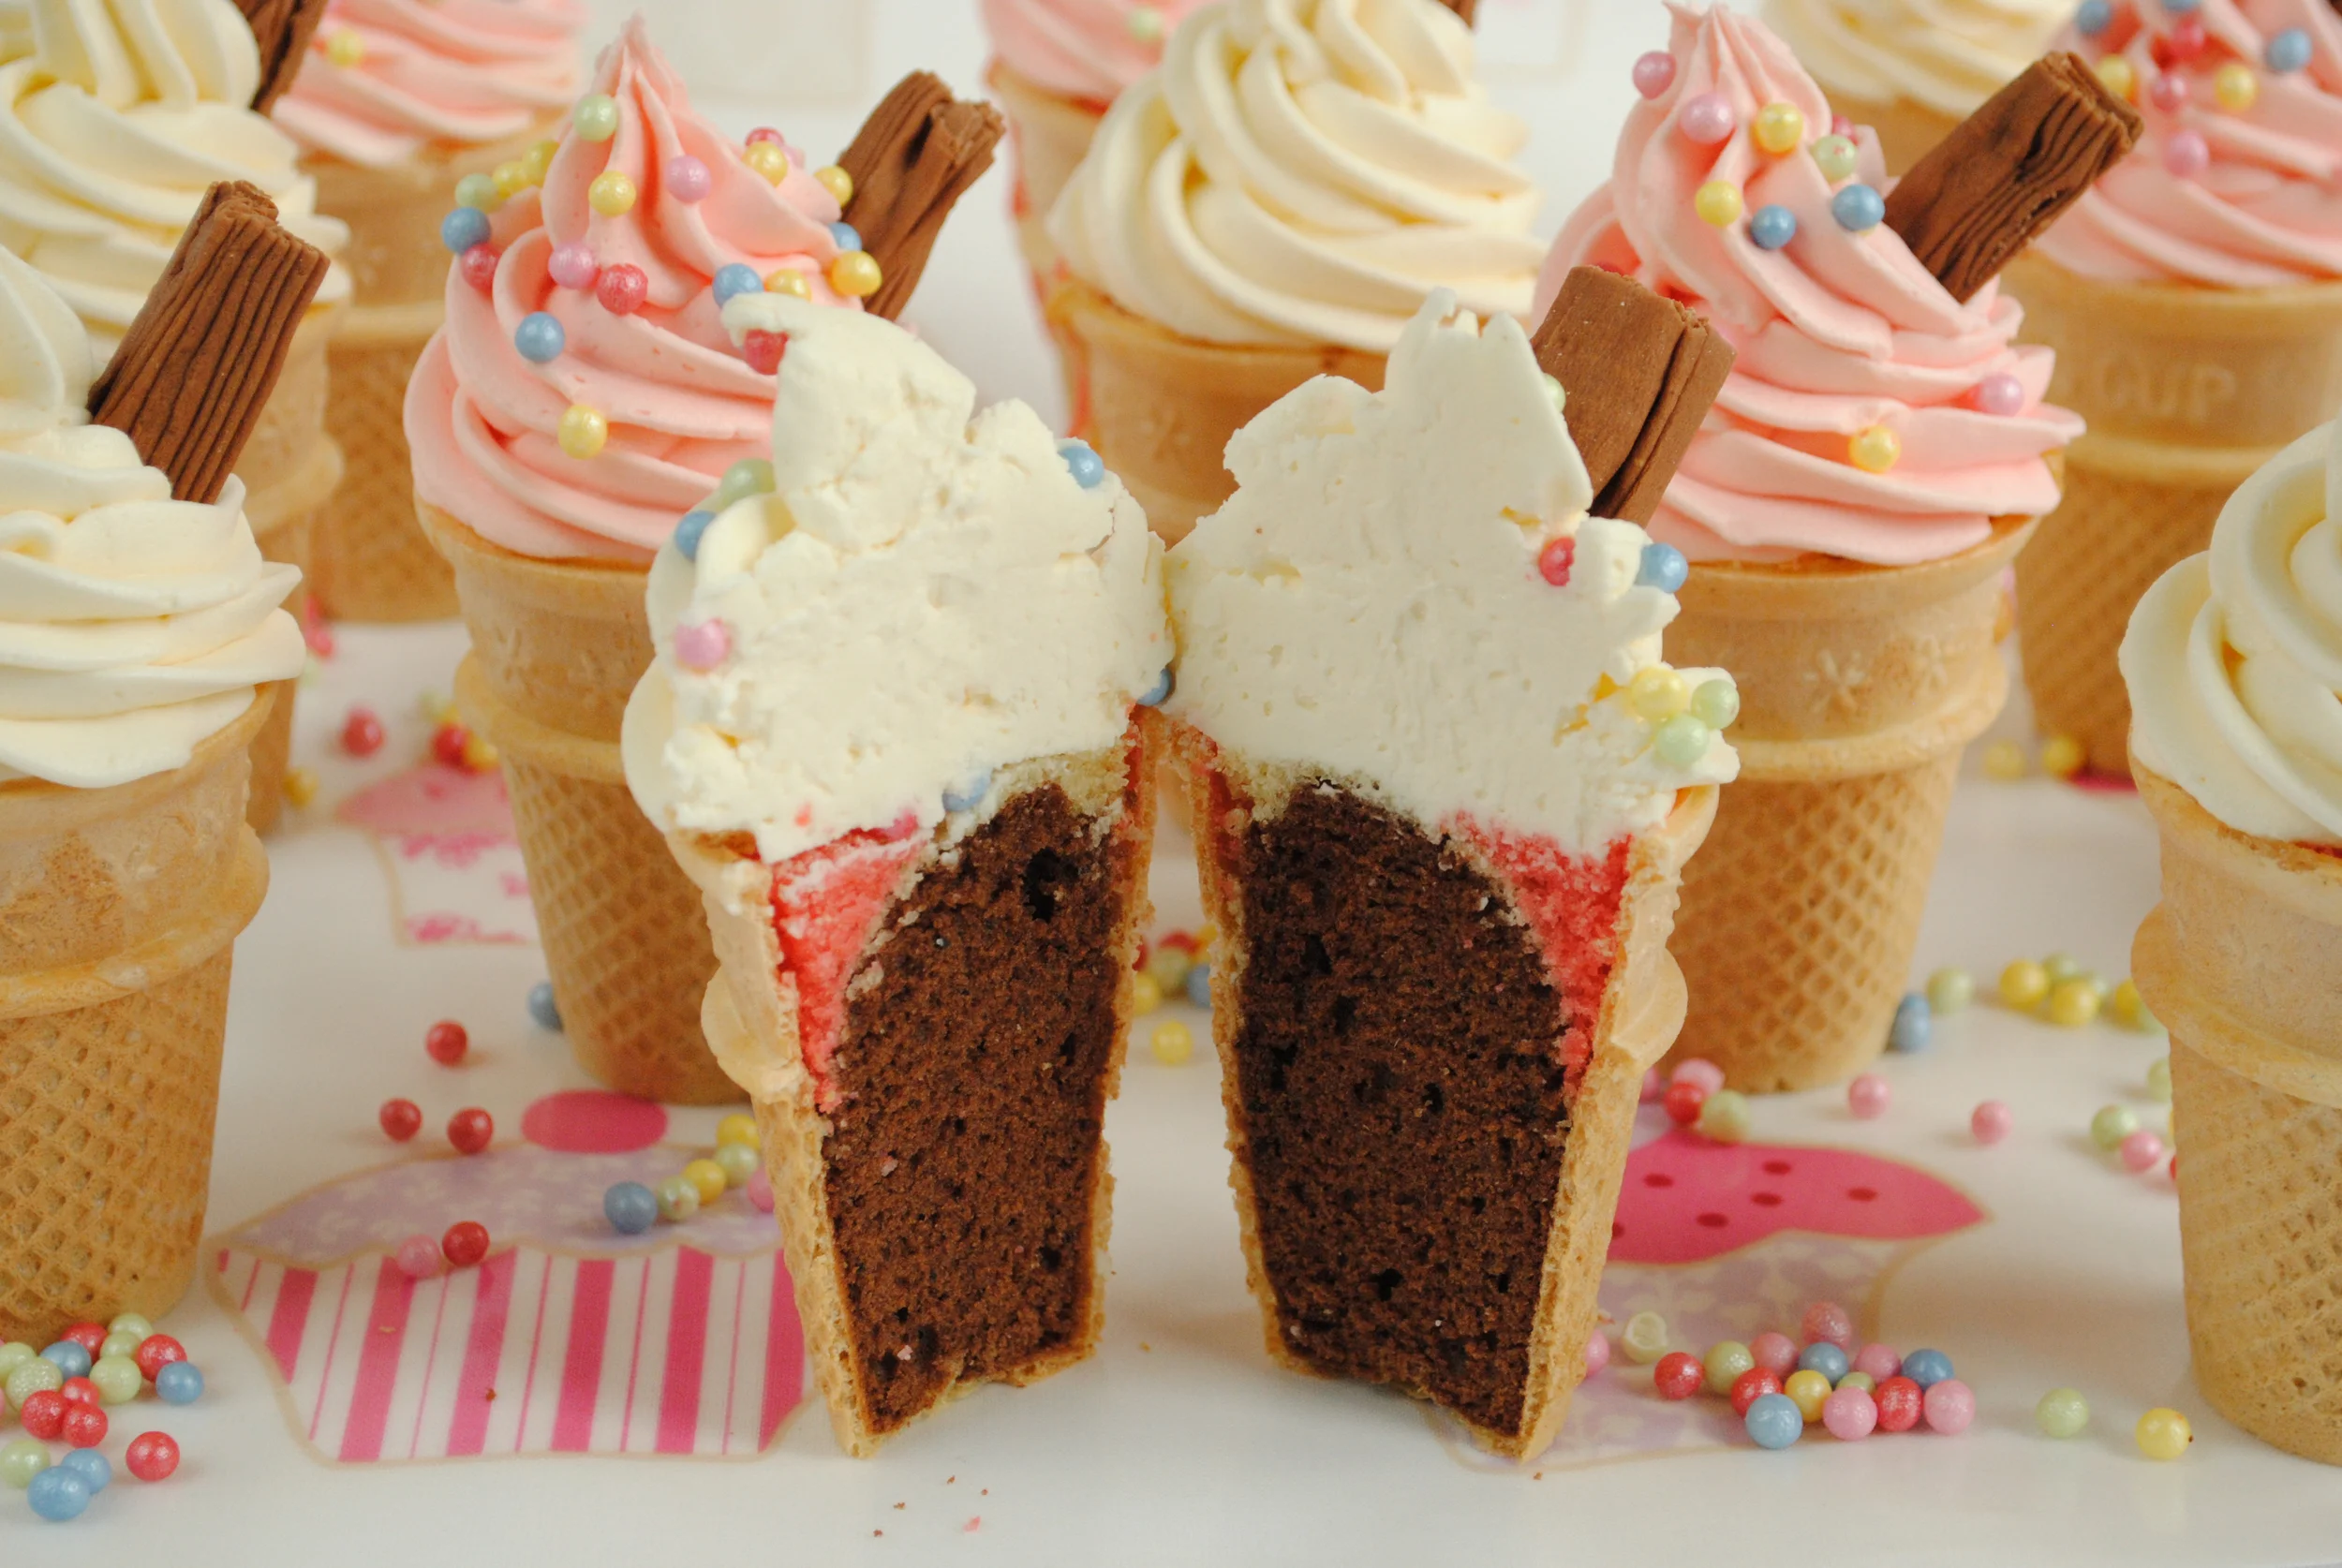
Ice Cream Cone Cupcakes are a brilliant idea for a children’s birthday party or alternatively a summery addition to an afternoon tea party! These yummy treats are so quick and easy to make and they look so effective. This recipe will make approx. 12 vanilla cupcake cones.

Ice Cream Cone Cupcakes

You will need:

For the Cake:

  • 150g  Unsalted Butter, Softened or Marg
  • 150g Caster Sugar
  • 150g Self Raising Flour
  • 3 Medium Eggs

For the topping:

  • 250g Unsalted Butter, Softened
  • 500g Icing Sugar
  • 2 teaspoons Vanilla Extract
  • 2 tablespoons of Milk

For the Decoration:

  • 12 Ice Cream Cone Cups
  • A box of Cadbury’s Ice Cream Flakes
  • Dr. Oetker’s Soft Shimmer Pearls


Method:

For best results it is better to bring the ingredients to room temperature before you begin.

Pre-heat your oven to 150 degrees and separate the Ice Cream Cone Cups and stand them in a deep cupcake tin. If you are having trouble getting your cones to stand, crunch tin foil around the outside to help support your cone.

Using a hand mixer on a medium setting, cream together the butter and caster sugar. Beat the eggs with a fork and slowly add to the mixture a little at a time.

You may need to add a spoonful of flour to stop the mixture from curdling.

Next fold the remaining flour into the mixture.

Ice Cream Cone Cupcakes How To

Using a dessert spoon, take one heaped spoonful per cone and divide the mixture in to your cupcake cones.

The mixture should come about half way up the cone case. 

Carefully place the cones in to the oven for approximately 25 -30 minutes or until golden brown and spring back to the touch!

Ice Cream Cone Cupcake Recipe

When the cakes are ready, carefully remove them from the oven. Leave the cakes stood in the tin to cool for 5 minutes and then place on a wire rack.

Whilst the cupcake cones are cooling you can begin to make your butter cream topping.

Using an electric hand or stand mixer, cream together your butter and icing sugar. Add 2 teaspoons of vanilla extract and add 1 tablespoon of milk at a time until you achieve a nice consistency for piping your butter cream. In warmer weather or warm kitchens less milk is needed.

I divided my butter cream into 2 separate bowls and mixed in a tiny amount of pink Sugar-Flair food colouring to one half of my butter cream to turn it pink!

Once your cakes have cooled, insert a large nozzle (ideally the Wilton or Jem 1M or 2D), into a piping bag and fill with butter cream. The nozzle pictured is from a large nozzle set from Lakeland.

Ice Cream Cone Cupcakes Tutorial

Starting at the outside edge of the cake, pipe a high swirl of butter cream by guiding the nozzle around the edge of the cone case, applying even pressure, circle around and around, on top of the previous layer below until you eventually end up at the centre.

Ice Cream Cone Cupcakes How to make

To decorate, cut an ice cream sized 99′ flake in half and gently push into the butter cream. Hold the cake above a bowl and add the sprinkles!

And voila! There you have 12 delicious Ice cream cone cupcakes!

This recipe will make approx. 12 vanilla cupcake cones.

If you would prefer to make a chocolate sponge then simply substitute 2 level tablespoons of flour for 2 level tablespoons of cocoa powder.

Swiss Meringue Buttercream Recipe (SMBC)

HOW TO MAKE SWISS MERINGUE BUTTER CREAM (SMBC)

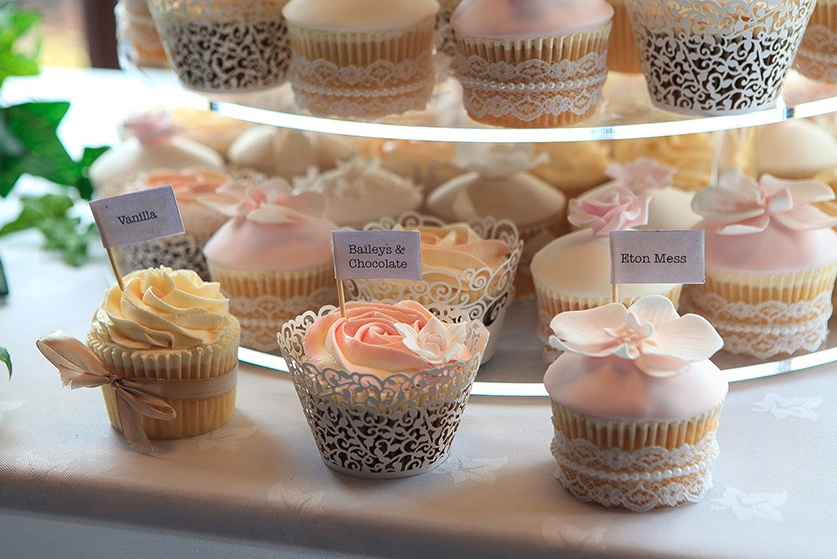
A little while ago we went in search of a very light and extremely creamy butter cream recipe to develop a new Eton Mess cupcake flavour, requested by a customer as part of their wedding cupcake order.

Eton Mess is typically made with fresh cream, crushed meringue and strawberries but as the cupcakes would be kept out of refrigeration for over 2 hours, using a fresh dairy product was not an option.

With 150 wedding guests to cater for it was very important that the buttercream recipe was 100% food safe for all guests, including any vulnerable guests such as pregnant women, the elderly and the young that may be in attendance and that is when we came across the Swiss meringue buttercream recipe.

Made with sugar, butter and egg whites, SMBC was the very light, extremely creamy and most importantly safe butter cream recipe we were looking for.

SMBC is very similar to, but slightly denser than Italian Meringue Butter Cream (IMBC). The advantage of SMBC is it’s slightly easier to make and the egg whites are heated to 160.c during the process, which is the temperature that salmonella bacteria are killed at, making it 100% food safe and ideal for our purpose.

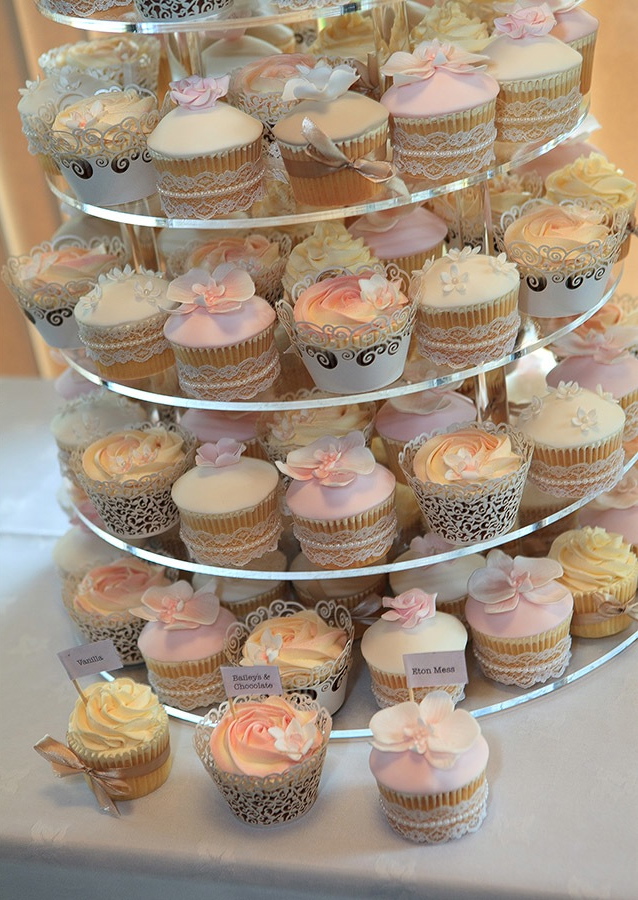
Here's some photos of the cupcakes set up at the wedding venue, followed by the recipe we used below.

SMBC Recipe

INGREDIENTS

  • 4 Egg Whites
  • 225g Caster Sugar
  • 1/4 tsp Cream of Tartar
  • 450g Unsalted Butter (softened)

METHOD

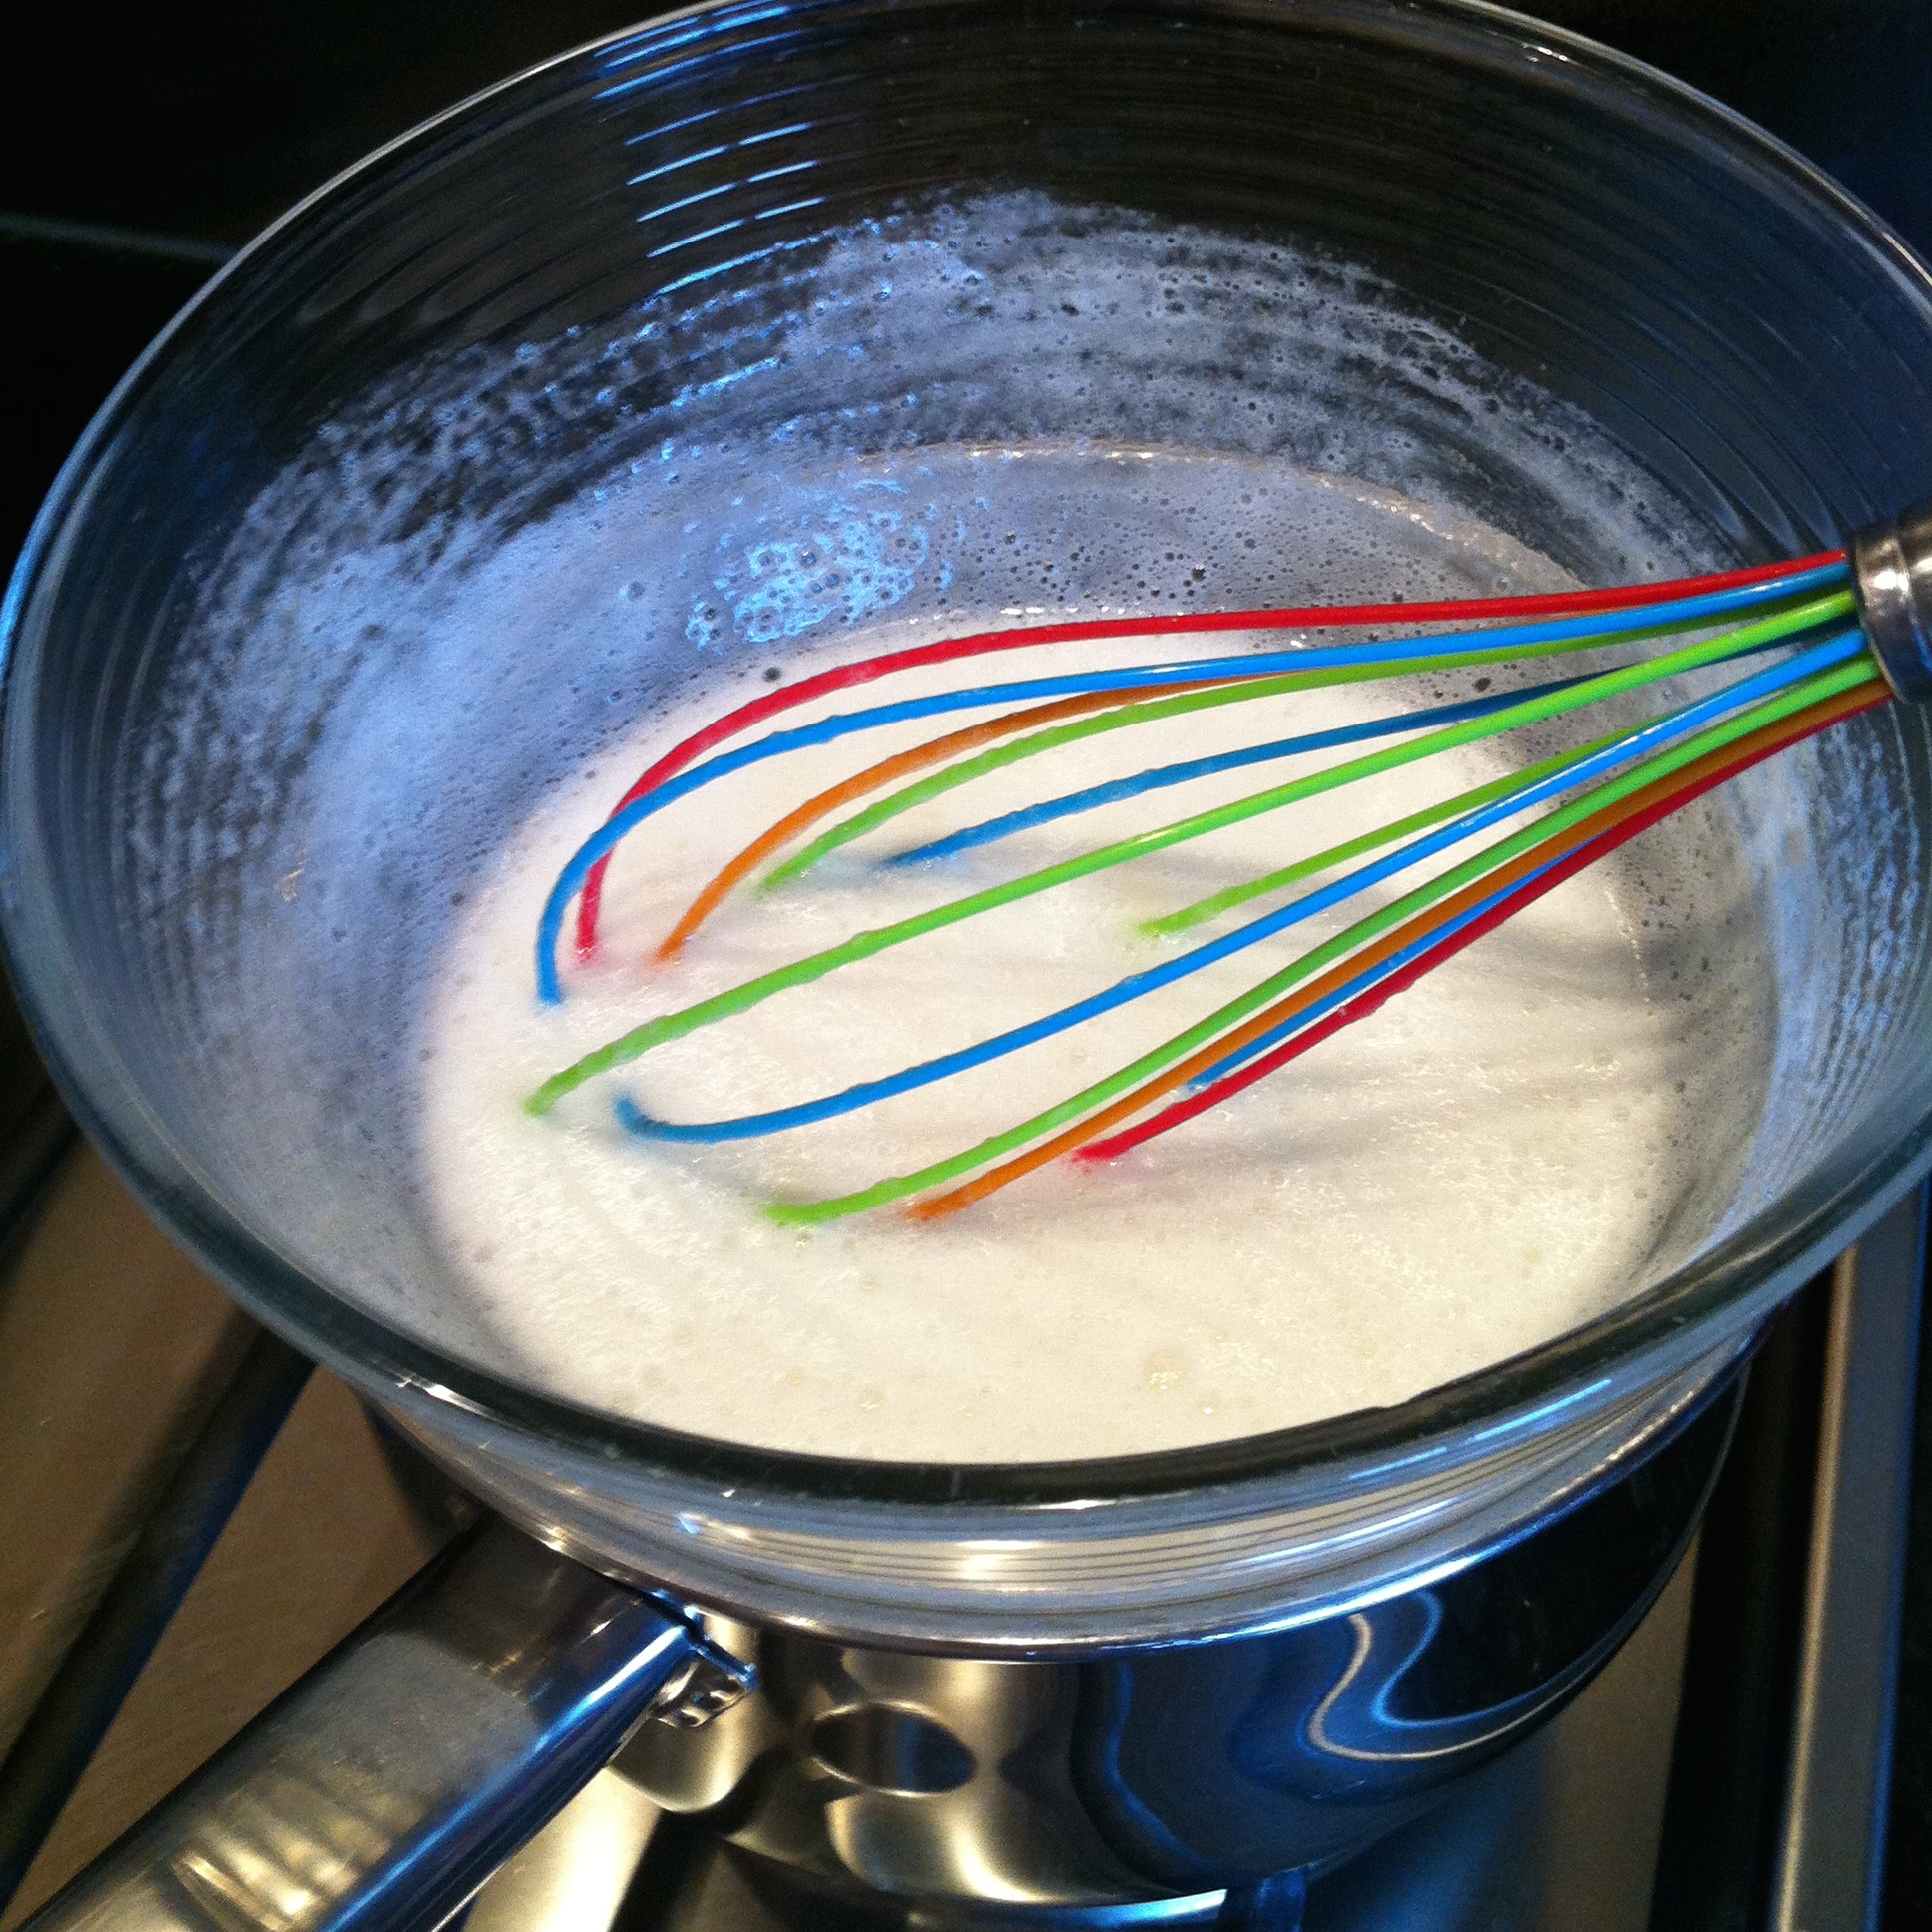
Place the egg whites, sugar and cream of tartar in a bowl and place over a pan of simmering water. Bring the ingredients together, whisking intermittently whilst the mixture warms. 

Swiss Meringue Butter Cream Recipe SMBC UK

After around 5 – 7 minutes your mixture should reach 160 degrees Fahrenheit. This is the all important temperature that Salmonella bacteria are killed.

Swiss Meringue Buttercream SMBC Recipe UK

Once the mixture has reached the desired temperature, carefully pour the syrup into the bowl of a stand mixer fitted with the whisk attachment and place on a high setting. After a few minutes the mixture will begin to transform into a white foam consistency and after 6 – 8 minutes the meringue mixture will form stiff white peaks.

Swiss Meringue Butter cream Recipe how to UK

Turn the mixer down to a medium/high speed and add a small amount of the softened butter at a time until it is all fully combined. If your butter cream starts to look a little bit curdled, turn up the speed of the mixer to bring together.

Butter bristol bath cupcake classes cake decorating

You should now have a light and creamy, versatile butter cream perfect for mixing in your required flavour. For a vanilla butter cream I add 2 teaspoons of vanilla extract and for a light and creamy lemon butter cream I add 2 heaped tablespoons of luxurious lemon curd.

SMBC Swiss meringue butter cream

Oreo Chocolate Cake Recipe

CHOCOLATE OREO CAKE WITH CREAM CHEESE BUTTER CREAM FROSTING

Oreo chocolate cake recipe

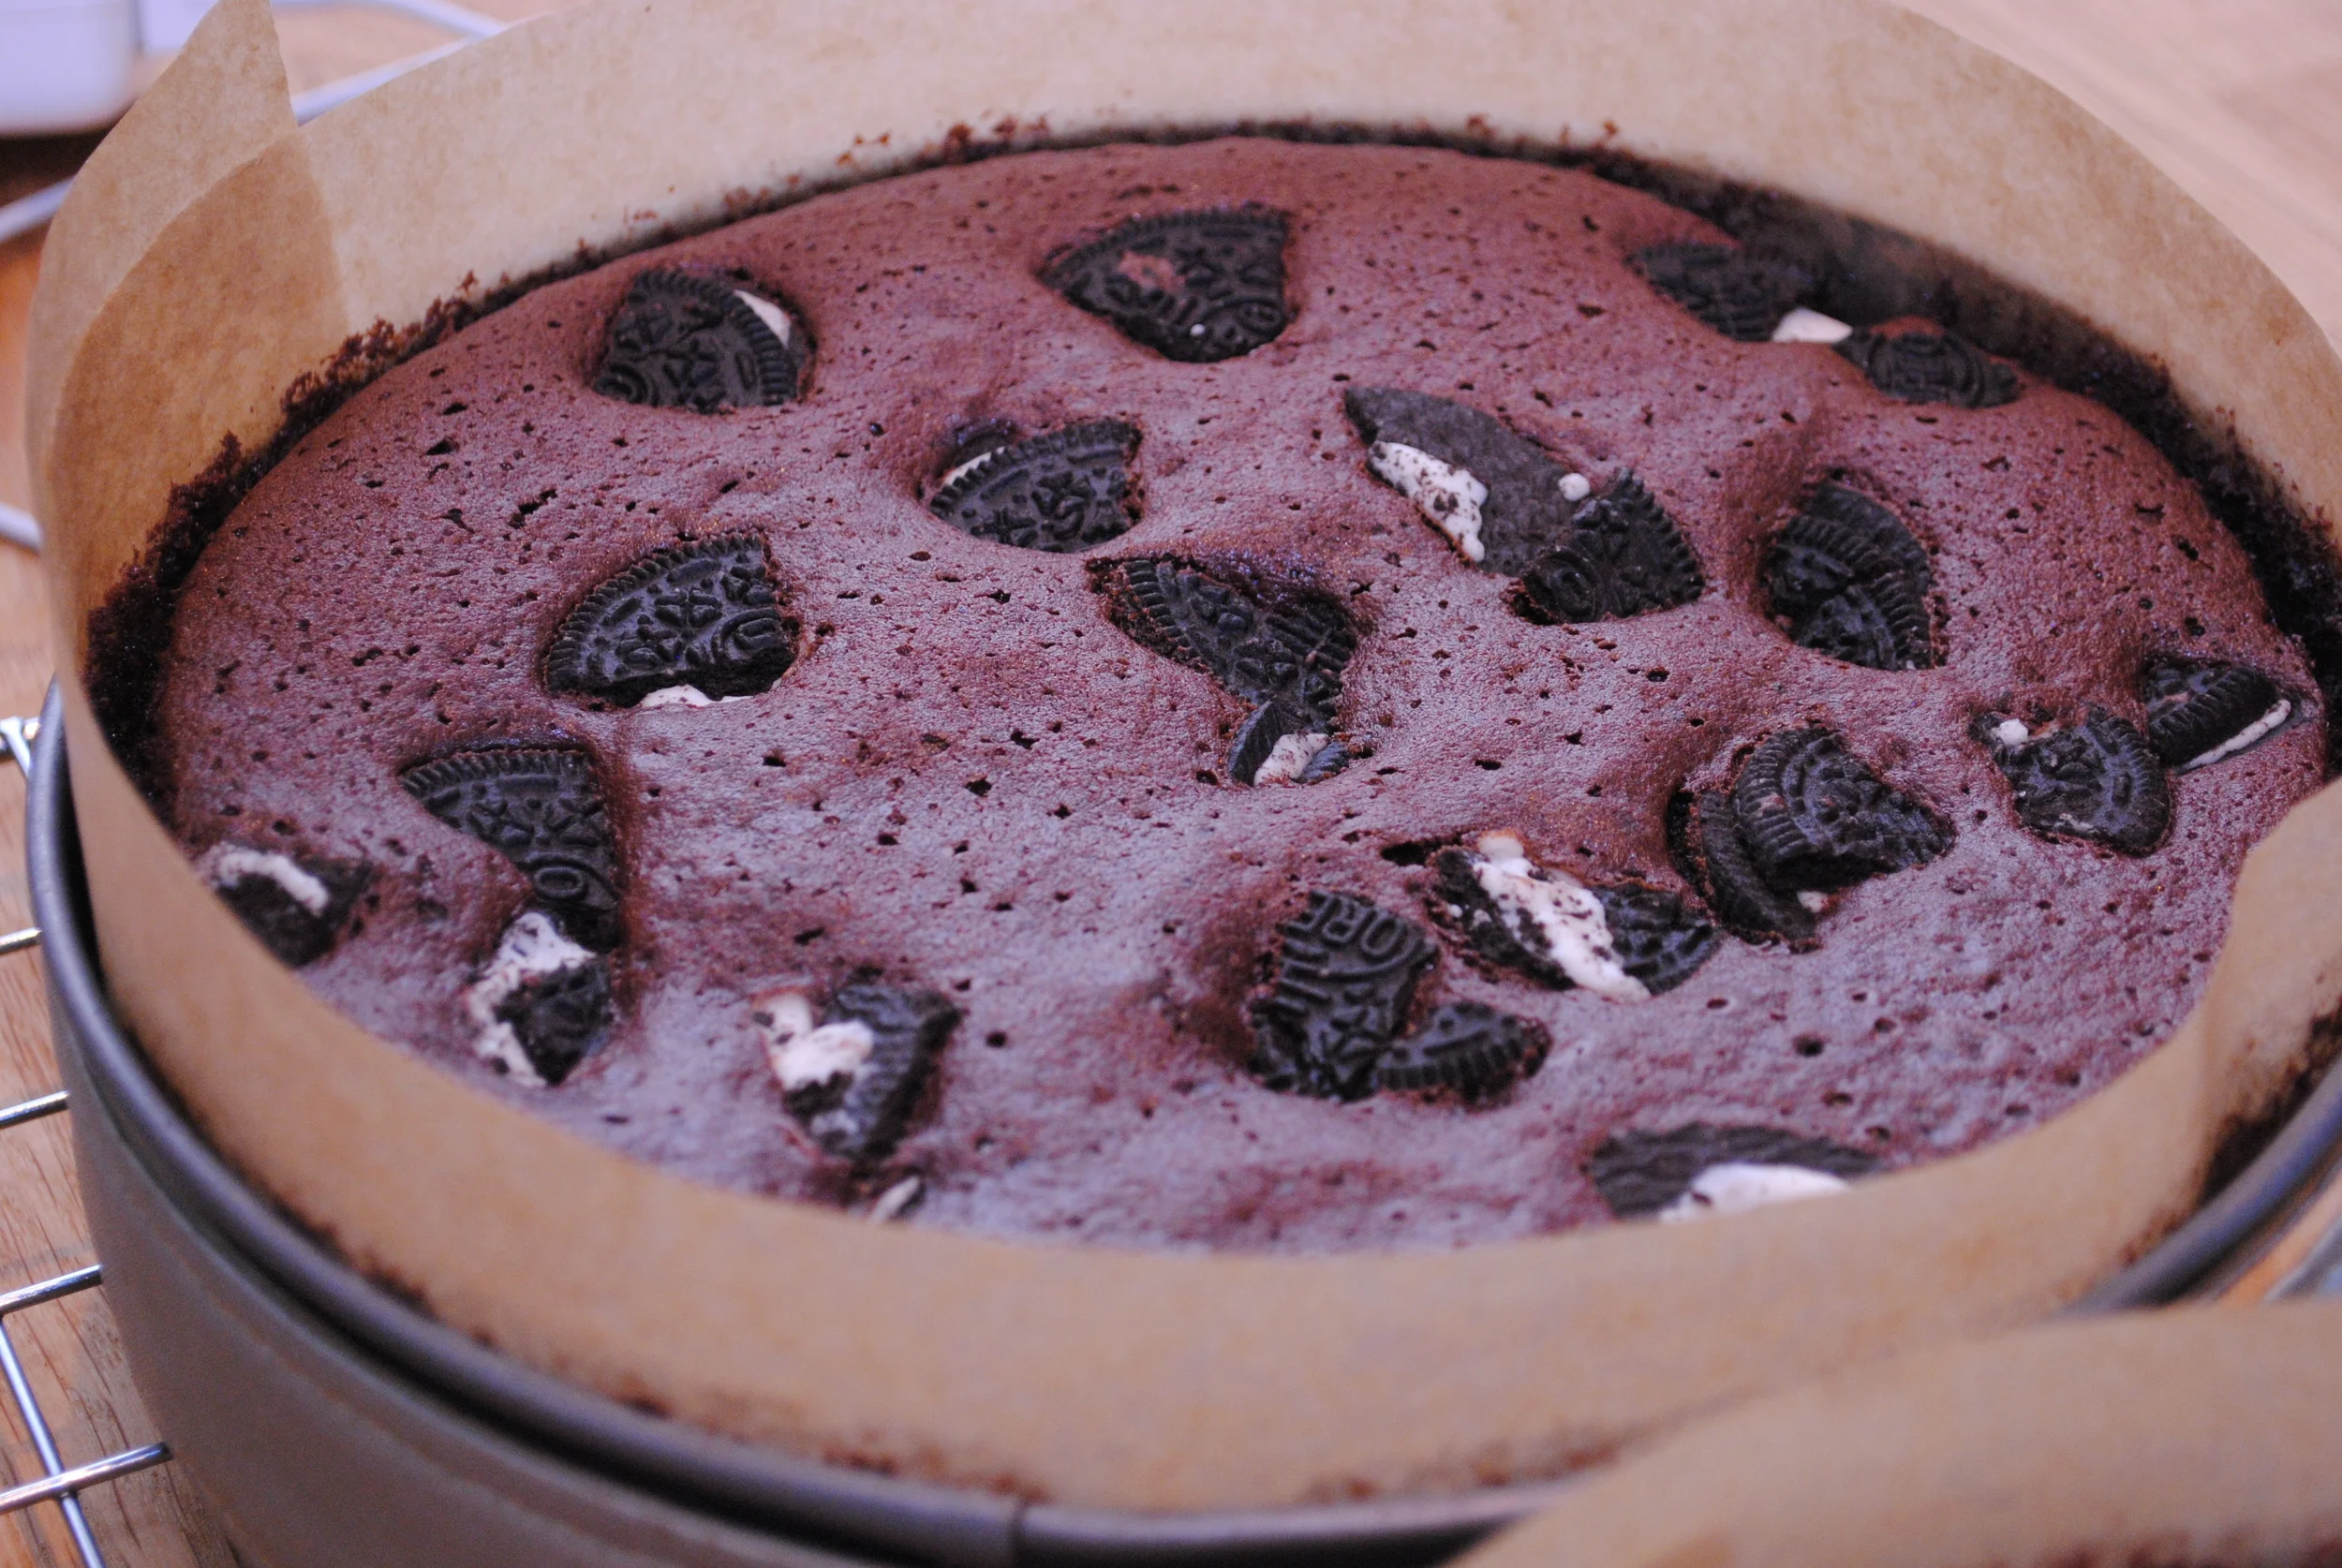
For my sons birthday this year I made a Chocolate Oreo Cake based on his favourite biscuit.

I couldn’t find an existing Oreo cake recipe I was completely satisfied with, so I decided to adapt a Mary Berry chocolate fudge cake recipe to suit my needs and make up my own cream cheese buttercream biscuit filling.

There is always potential for disaster when adapting and experimenting with new recipes, but I am pleased to say that this cake was a huge success!

Now I’m not going to lie to you! This cake is naughty but as my son would say ‘OMG!!!’ It is incredibly nice!

Oreo Cake Recipe


Ingredients

FOR THE CAKE

  • 50 g (2 oz) sifted cocoa powder
  • 6 tablespoons boiling water
  • 3 Large Eggs
  • 50 ml (2 fl oz) milk
  • 175 g (6 oz) self-raising flour
  • 1 rounded teaspoon baking powder
  • 100 g (4 oz) softened butter
  • 275 g (10 oz) caster sugar
  • 6 Oreo cookies

FOR THE FROSTING

  • 200g Full Fat Cream Cheese
  •  175g Butter
  • 500g Icing Sugar
  • 12 – 14 Oreo Cookies

FOR THE DECORATION

  • Mini Oreo Cookies 


Method

1 Pre-heat the oven to 180°C/Fan 160°C/Gas 4. Line two 20 cm (8 in) sandwich tins with baking parchment.

2 Blend the cocoa and boiling water in a large bowl. Add the eggs, milk, softened butter and caster sugar and mix with an electric hand mixer. Fold in the sifted flour and baking powder and mix until the mixture has become a smooth batter. Divide the cake mix equally between the prepared tins and level the surface.

3 Roughly crush 6 Oreo biscuits in your hands one at a time and sprinkle onto the top of the cake mix sat in the tins. Push the pieces of biscuit down into the cake mix but do not submerge.

4 Bake in the pre-heated oven for about 30–35 minutes or until well risen and the tops of the cakes spring back when lightly pressed with a finger. Leave to cool in the tins for a few minutes then turn out on to a wire rack to cool. Handle carefully so as not to disturb the pieces of biscuit.

5 To make the frosting, using a hand mixer, beat together the cream cheese and softened butter until smooth. Sift the icing sugar into the mixture and whisk until combined. Mix on a high speed until light and fluffy with a white apperance.

6 Place 12 – 14 Oreos into a strong sandwich bag and secure the top of the bag. Crush the Oreos with a rolling pin or spoon until they form your required sized crumbs and pour into the bowl of frosting and mix.

7 Once your cakes have cooled, remove any remaining baking parchment and place one cake onto a cake plate, Oreo side up. Add a generous layer of cream cheese Oreo frosting to the bottom cake and sandwich the cakes together, again Oreo side up. Spread another generous layer of frosting over the top of the cake and decorate with mini Oreo biscuits.

oreo chocolate cake


Top Tips

Remember, when using a cream cheese frosting, this cake should either be kept in the fridge and consumed within 5 days or consumed within 2 days if kept out of the fridge.

If you do refrigerate the cake, it is best enjoyed once brought back to room temperature.

To save the Oreo biscuits going too soft, I prefer to make and add the frosting just before serving.

If you would prefer not to use cream cheese, you can replace this with an extra 75g of butter and 3 tbsp of milk, and 2 tsp of vanilla extract.